Thursday, May 13, 2010

Masculine Flip Cards


Hi people.  Hope all you ladies out there had a lovely mothers day celebrating with your children and/or your wonderful mums.  I know I had a lovely day cos I got spoilt!  Now that Mother's day is over I guess we can all start to think about less feminine cards. 

So for today's post I have made two masculine flip cards for those men in our lives.  When you open the card the middle flap actually flips over and reveals your sentiment.  Quite clever really.

To make this card I have used the gorgeous Graphic 45 Punch outs, Darkroom door background stamp, bottle tops (squashed in the cuttlebug) and some twine.  I have just finished off the cards with some inks and voila!  Very simple!


and then flipped open to reveal inside sentiment...


Thanks for stopping by.  Hope to see you back here soon. xx

Tuesday, May 4, 2010

Sunset and midnight sky cards

Hi again.  Though that I may as well do a couple of posts today while I am on a role (it's bucketing down with rain so, hey, what else can I do?).

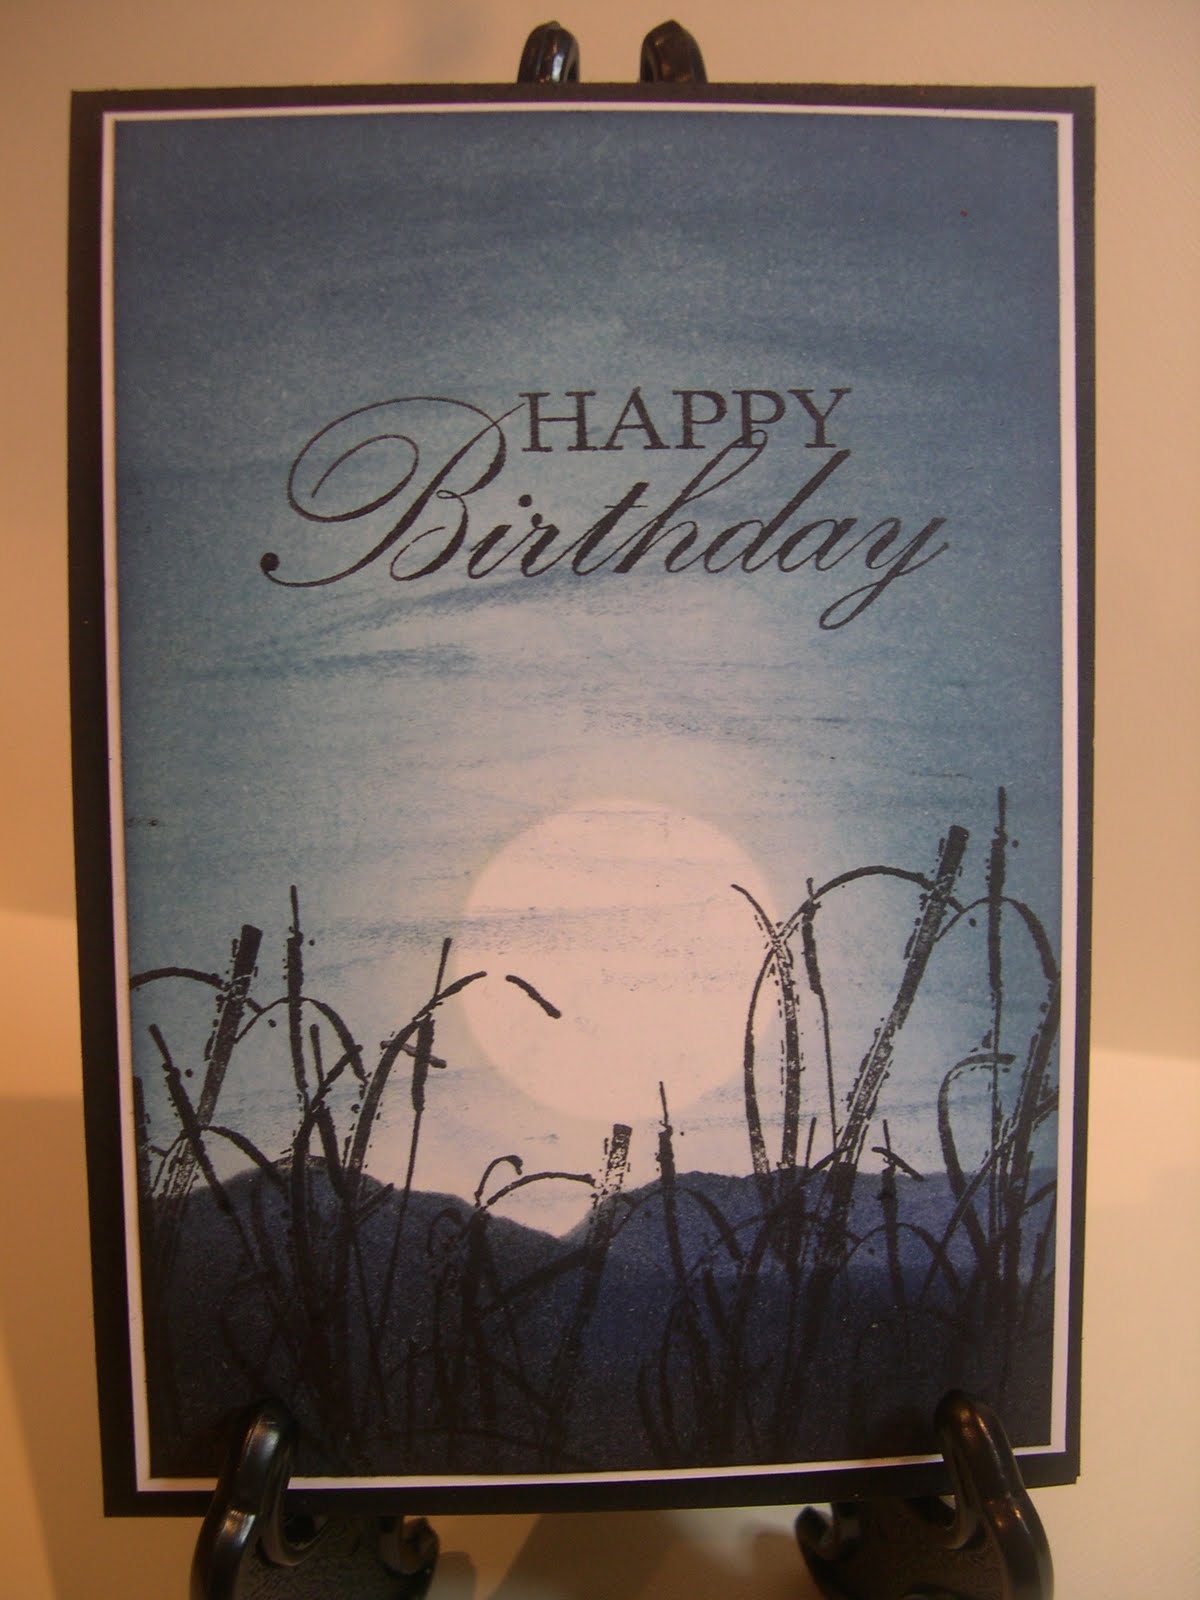
With these cards I punched out a circle big enough to act as a mask for the sun and the moon.  I also tore a piece of card long enough to go the width of both cards.  The inks used for both the cards are Tim Holtz Distress inks (my faves) and they have just been applied with a blending applicator tool.  A sponge would also suffice if you didn't have the blender tool.

For the sunset card I used Mustard Seed,  Dried Marigold, Spiced Marmalade, Rusty Hinge and barn door for the sky.  I then used walnut stain and black soot for the hills.  I then stamped the flowers and reeves with Black Soot and the verse was stamped with Black Staz On.

For the midnight sky card I used rumbled glass, broken china, stormy sky and shipped sapphire.  For the hills I used shipped sapphire and black soot.  Once again reeves are stamped with Black soot and sentiment stamped with black Staz On.  All stamps are from Kaszazz.


Very simple, yet soooo effective!  Enjoy. xx

Gift Card Holders

Hi everyone.  Sorry I haven't posted for a while.  It is all due to being extremely busy, plus trying to finish our renovation.  Time seems to just zip by.  Cannot believe we are almost at the end of the financial year ALREADY!!!!!  I came to this realisation the other day when trying to finalise my workshop projects for "Christmas in July". Yes this is also just around the corner.  I will post the details of this workshop when it gets a little closer for those who are interested.


Now onto today's post. .....


It seems to become harder with each passing year to come up with great gift ideas so decided to have a workshop for a gift card holder.  I have made one for a male recipient and one for a female.  I have used the new Tim Holtz dies for these (which I just luuurrrve to bits).  The dimensions are a piece of card measuring 4 in x 12 in then scored at 4 in, 6 in and 8 in.  You then fold into a W with the short flap in the inside of the card.  On the fold of the little flap on the inside, using your craft knife you place a slit long enough to fit your gift card into.  Then you can stick the little flap together on the other side making sure to use thin tape so that your gift card slips into the slot nicely.  You can decorate according to the occasion.

Front cover

Inside

Front cover

Inside

Well I hope you have fun trying this one.  Until next time, happy scrappin'.  xx

Wednesday, April 14, 2010

Single page layout


Ohhhhh I had such fun creating this single page layout.  Just recently one of my old neighbours asked me to make a special page for her best friends 70th birthday.  You see this was no easy task as the recipient is  an avid scrapbooker and my neighbour wanted it to be something very special.  Well did I have a blast.  I just love scrapbooking. It is what got me into card making in the first place.

So my little challange began.  The photograph that she supplied matched perfectly to the Kaszazz flourish range of papers so the concept of the page just flowed from that.  I also used Tim Holtz distress inks to give that aged look.  The bling is also from Kaszazz (you can never have too much bling).  Some of the flowers have been cut using the Tim Holtz Distress flowers die the others are kaiser and hand made vintage flowers.  I then made a little booklet for my neighbour to journal things about their friendship over the years.  I also stamped the inside with various friendship verse.  The booklet is very cheekily attached to the page with little velcro spots on the back so that it can be taken on and off the page quite easily to be able to read.


Well I hope you all have a fab week and see you all here again soon. X

Sunday, April 11, 2010

Gift Tag holder and tags

This week in our card making class we made something a little different but it still was based around gift giving of course.

The tag holder was made using a buff manilla folder cut down and scored.  We then used some coin envelopes for the insert and taped them in to act as little pockets and used velcro dots for the closure.  We then got to grunging up the outside and boy did the ladies have some fun doing this.

Embellies used were Jewellery bits and bobs. Imaginisce flowers, brads, some angel wings (which for the life of me I cannot remember where I got them from), organza ribbon, sizzix slide folder die, Kaiser stamps and my favourite Kaszazz paper from the Enchanted range.


And below are a sample of some the tags we will be making next week.  I will be giving ladies a demo of several different techniques and then they will get to make 10 - 12 tags to go in their little holder.  These will vary using glimmer mist. distress inks, perfect pearls etc.  I am soooo looking forward to this class cos I just love GRUNGE.


Well thanks for looking and see you all back here soon. X

Tiger May new release Stamp

Here's one for all you Kaszazz fans.  This is a card I made using the Tiger stamp that is a pre-release to the May mini catalogue coming out next month.  I just fell in love with this stamp as soon as I saw it and HAD TO HAVE IT. 

To make this card I stamped the image on plain white card with watermark and used black embossing powder and heat set.  I then used Molasses, Pumpkin and Gold Lame Smooch paints to colour the tiger in patches.  I think it was quite effective.  I then matted it on brown basil card and used pop dots on the back.  On the next layer of white I used my zig two way glue pen and just smooshed glue randomly in a strip on either side of the top layer.  I waited for it to dry until it became tacky then rubbed two different tones of metalic foils over. I then matted this layer on brown basil as well then taped direct to the card base. 


It is hard to see the proper effect of the foil but believe me, it looks absolutely stunning and compliments the smooch fantastically.  Hope you like.

Thanks for looking

Unity Stamp Quick makes

Hello peeps. I am just loving the Unity Stamps "Kit of the Month" at the moment.  They are just such great value and are amazing quality stamps.  I get mine from a little place Called Craftalot situated at Logan (a little drive down the road from the Gold Coast - Australia).  It is wonderful, when they come in they just bill my credit card and mail them express post.....can't get any better than that! It is well worth the visit to the Unity website to checkout their stamps. www.unitystampco.com/

For the card below I have used the lady bug and sentiment from the March KOTM.  The bugs have been stamped 3 times each and coloured using copic markers.  I then cut out different pieces and layered them to add dimension and finished with gossy accents.  I also used some prima flowers, buttons which I have had for soooo long I can't even remember where I got them from!


This card I used the Jukebox and sentiment  from the March KOTM and coloured it using Twinkling H2O's (thanx Jackie you have now got me hooked and WANT some).  I used the music cuttlebug folder to emboss the background.


The gingham background on both cards is a Dark Room Door stamp and I have just cut a small strip to run along the bottom of the cards under the ribbon.

Well thanks for looking. X